
EASY PIN-HOLE METHODS TO VIEW THE ECLIPSE
Trees – nature’s pin-holes
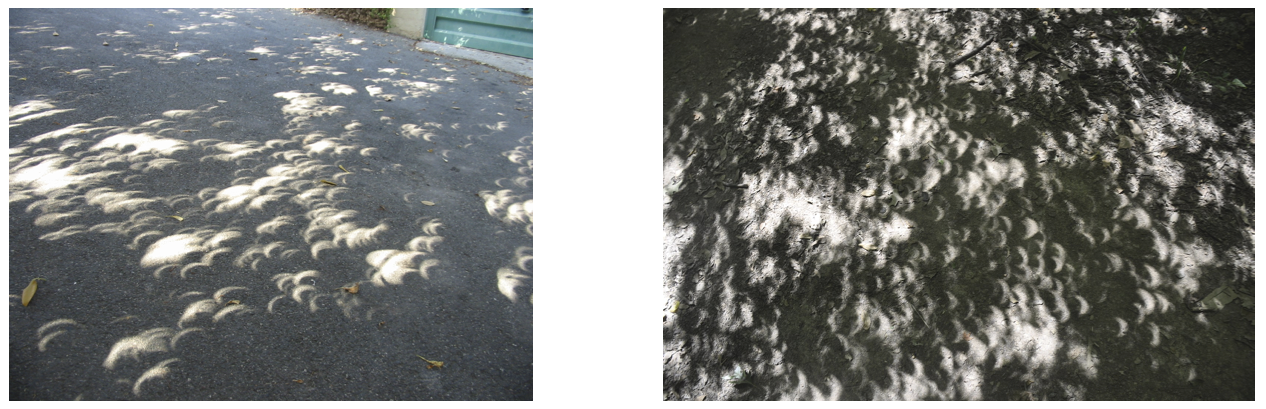
Trees provide us with hundreds of pin-holes at no cost. The gaps between the leaves act as pin-holes, casting multiple images of the sun on the ground for us all to enjoy. These images will move constantly as the wind shakes the leaves, creating a wonderful sight indeed. A video of this phenomenon taken during the 21 Aug 2017 eclipse can be found here.
Forming pin-holes from household items
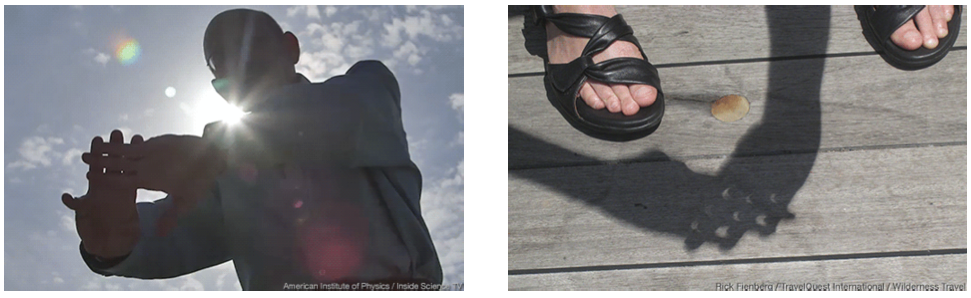
We can use any pin-hole which is not more than a few mm wide to form an image of the eclipsed sun on a surface a metre or so away. You can interleave your fingers, use a kitchen sieve, or even poke multiple holes in a cardboard to make the eclipsed sun spell out your name or any other pattern.
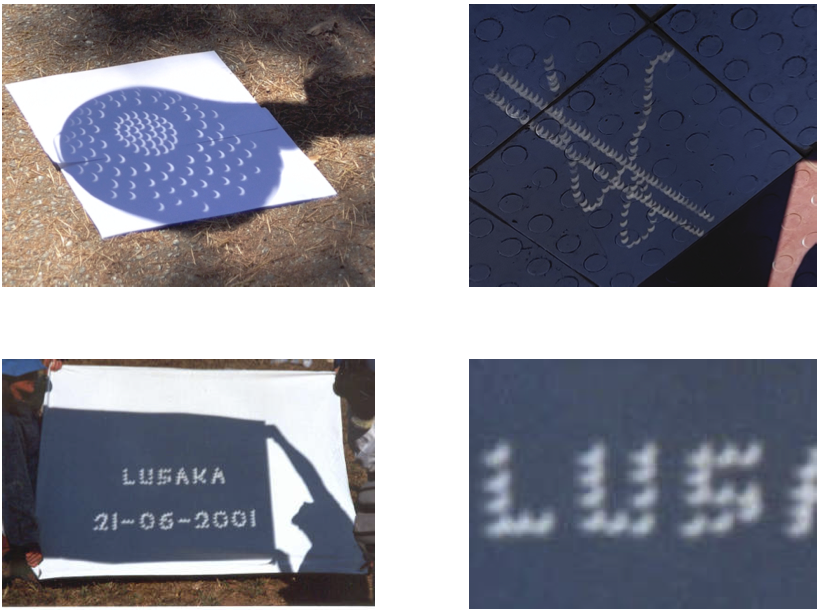
Top left: Multiple images of the partial eclipse on 21 Aug 2017 through a kitchen sieve, by Joe Mabel from USA
Top right: The border of south India and the path of the solar eclipse on 26 Dec 2019, imaged through multiple pin-holes on cardboard by school students in Ooty, India, by Neelam and Ajay Talwar
Bottom: From http://www.eclipseafrica.org/
Making a pin-hole box
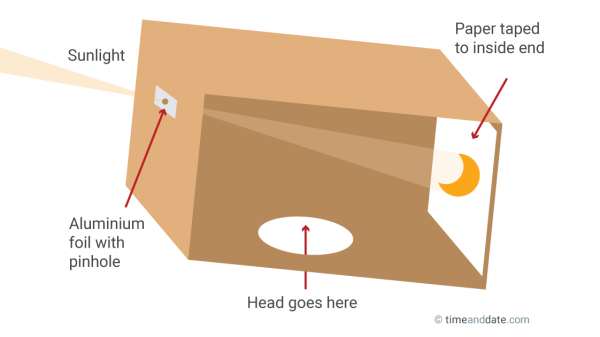
You can construct your own pin-hole box, as well. Take a long cardboard box and poke a pin-hole in the centre of one of the faces. Paste a sheet of white paper on the inside of the opposite face, and cut an opening on the side to let you see the image. Close the other sides to cut out ambient light from falling on the screen. The longer the box, the larger will be the image. For more information, see here.
Flat mirrors as pin-holes
There is a clever way to use small flat mirrors as pin-holes to create much larger images of the sun easily. In this case, the mirror does by reflection what the pin-hole does by transmission. Take a small flat household mirror of size roughly 0.5 cm (you can paste a paper mask with a central hole over a larger mirror too). Take it outside your house and angle it such that it reflects the sun into a room through a window, onto a piece of paper on a wall. Since the distance between this mirror and the paper on the wall can be as large as 30-40 metres, you will get an image of the sun that is 30-40 cm big! If the room is otherwise darkened, the image will be brighter. If the exposed mirror surface is too small, you may not get enough light, but if it is too big, the image will not be sharp, Experiment with these parameters to get a good image in the days ahead. If you get a sharp enough image, this method can be used to see even large sunspots on any given day.

How do we angle the mirror easily and how do we follow the sun as it moves in the sky? An ingenuous ball-mirror mount, developed by Navnirmiti Foundation in India, can solve this problem. Take a plastic ball which is about 15-20 cm in diameter and stick the small mirror on its surface. If this ball is placed on a support like a kitchen bowl on top of a stool, you can easily rotate the ball to send the beam of sun directly into your room! A video demo is available here and a detailed document can be downloaded from here.
Be careful that no one gets in the path of the reflected light!